https://growth-coder.tistory.com/152
이전 포스팅에서 간단하게 날씨와 미세먼지를 알려주는 Amazon Lex 챗봇을 만들어보았다.
물론 람다를 연결하지 않았기 때문에 실제로 동작하지는 않고 단지 의도를 분류해내는 수준이다.
우선 스프링부트로 배포를 해보고 람다를 연결해서 실제로 동작하게끔 해보려 한다.
우선 스프링이 Lex에 접근할 수 있도록 IAM 사용자를 만들어야 한다.
IAM -> 사용자에서 사용자를 추가한다.

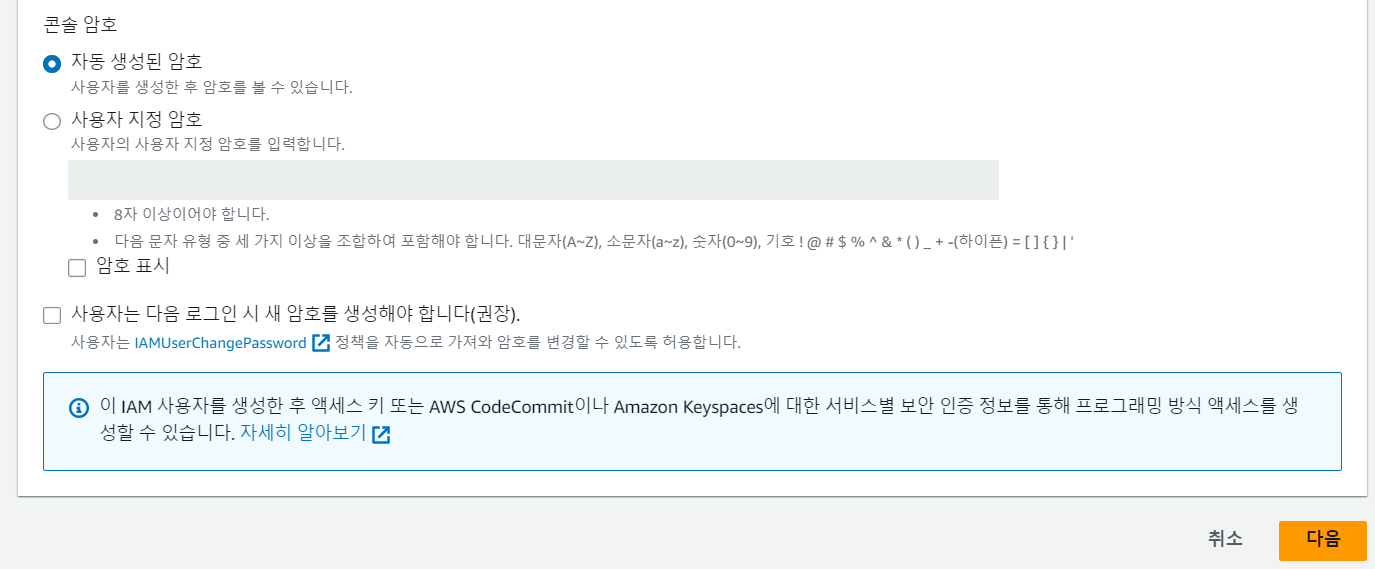
다음과 같이 설정을 한다.


직접 정책 연결을 선택한다.

AmazonLexFullAccess 정책을 검색해서 선택하고 다음으로 넘어간다.

사용자 목록을 돌아간다.

생성한 사용자에 들어가서 보안 자격 증명에 들어간다.

아래로 내려보면 액세스 키 만들기가 있다. 선택한다.

로컬에서 실행할 예정이므로 로컬 코드를 선택하고 다음으로 넘어간다.

생성된 Access key와 Secret key를 기억해둔다.

IAM 사용자에게 직접 정책을 부여하는 장기 자격 증명 방식을 사용하였다.
물론 이 방식은 액세스 키와 시크릿 키의 탈취 문제 때문에 좋은 방법이라 보기는 어렵지만 일단 배포 테스트이기 때문에 이 방식을 선택했다.
실제로 구현할 때는 임시 자격 증명 방식을 사용하는 것이 좋다.
이제 이전 포스팅에서 만든 Lex 봇에 들어간다.
봇 세부 정보에서 ID를 기억해둔다.

버전에 들어가면 아마 초안 버전 하나만 있을 것이다. 배포해야하므로 새로운 버전을 생성한다.

이제 별칭을 들어가서 별칭을 생성하는데 초안 버전이 아니라 방금 만들었던 버전을 선택하여 연결한다.

이제 만든 별칭에 들어가서 별칭 Id를 기억해둔다.
기존에 존재하던 TestBotAlias 별칭의 경우 테스트에만 사용하도록 권장되기 때문에 새로운 별칭을 만든 것이다.
인테리제이의 build.gradle의 dependencies에 다음 코드를 추가한다.
dependencies{
    .
    .
    .
	implementation platform('software.amazon.awssdk:bom:2.20.4')
	implementation 'software.amazon.awssdk:auth'
	implementation 'software.amazon.awssdk:lexruntimev2'
	implementation 'software.amazon.awssdk:regions'
}
이제 인텔리제이에서 다음과 같은 메인 코드를 입력한다.
public class WeatherAndDustApplication {

    public static void main(String[] args) throws URISyntaxException, InterruptedException {
        String botId = "봇 아이디";
        String botAliasId = "봇 별칭 아이디";
        String localeId = "ko_KR";
        String accessKey = "액세스 키";
        String secretKey = "시크릿 키";
        String sessionId = UUID.randomUUID().toString();
        Region region = Region.AP_NORTHEAST_2; // 봇을 배포한 리전 선택. 서울이라면 AP_NORTHEAST_2이다.

        AwsBasicCredentials awsCreds = AwsBasicCredentials.create(accessKey, secretKey);
        AwsCredentialsProvider awsCredentialsProvider = StaticCredentialsProvider.create(awsCreds);

        LexRuntimeV2Client lexV2Client = LexRuntimeV2Client
                .builder()
                .credentialsProvider(awsCredentialsProvider)
                .region(region)
                .build();

        // utterance 1
        String userInput = "날씨 알려줘";
        RecognizeTextRequest recognizeTextRequest = getRecognizeTextRequest(botId, botAliasId, localeId, sessionId, userInput);
        RecognizeTextResponse recognizeTextResponse = lexV2Client.recognizeText(recognizeTextRequest);

        System.out.println("User : " + userInput);
        recognizeTextResponse.messages().forEach(message -> {
            System.out.println("Bot : " + message.content());
        });

        // utterance 2
        userInput = "4월 7일";
        recognizeTextRequest = getRecognizeTextRequest(botId, botAliasId, localeId, sessionId, userInput);
        recognizeTextResponse = lexV2Client.recognizeText(recognizeTextRequest);

        System.out.println("User : " + userInput);
        recognizeTextResponse.messages().forEach(message -> {
            System.out.println("Bot : " + message.content());
        });

        // utterance 3
        userInput = "서울";
        recognizeTextRequest = getRecognizeTextRequest(botId, botAliasId, localeId, sessionId, userInput);
        recognizeTextResponse = lexV2Client.recognizeText(recognizeTextRequest);

        System.out.println("User : " + userInput);
        recognizeTextResponse.messages().forEach(message -> {
            System.out.println("Bot : " + message.content());
        });


    }

    private static RecognizeTextRequest getRecognizeTextRequest(String botId, String botAliasId, String localeId, String sessionId, String userInput) {
        RecognizeTextRequest recognizeTextRequest = RecognizeTextRequest.builder()
                .botAliasId(botAliasId)
                .botId(botId)
                .localeId(localeId)
                .sessionId(sessionId)
                .text(userInput)
                .build();
        return recognizeTextRequest;
    }
}
코드를 잘 살펴보면 쉽게 이해할 수 있을 것이다. 이제 코드를 실행한다.
굉장히 많은 내용들이 출력되는 모습을 볼 수 있는데 "User : "와 "Bot : "을 위주로 보면 우리가 만든 슬롯을 채우기 위해 질문들을 던지는 모습을 확인할 수 있다.


참고
https://docs.aws.amazon.com/ko_kr/lexv2/latest/dg/deploy-java.html
자바 애플리케이션을 사용하여 Amazon Lex V2 봇과 상호 작용하기 - Amazon Lex
이 페이지에 작업이 필요하다는 점을 알려 주셔서 감사합니다. 실망시켜 드려 죄송합니다. 잠깐 시간을 내어 설명서를 향상시킬 수 있는 방법에 대해 말씀해 주십시오.
docs.aws.amazon.com
'공부 > AWS' 카테고리의 다른 글
| [AWS] public subnet에 EC2, private subnet에 RDS 인스턴스 생성하기 (2) (2) | 2023.05.03 |
|---|---|
| [AWS] public subnet에 EC2, private subnet에 RDS 인스턴스 생성하기 (1) (0) | 2023.05.02 |
| [AWS][Lex] Amazon Lex 사용해서 챗봇 구현하기 (1) (0) | 2023.04.13 |
| [AWS] 프리티어 계정 Elastic Compute Cloud 요금 발생 (0) | 2023.04.09 |
| [AWS][Lambda] API gateway - Lambda - rds 연동 (4) (0) | 2023.04.08 |